Check the system requirements here.
Download the latest version at: http://www.sync2.com/Download.aspx and save the downloaded file to an easy-to-find location.
Install the product by clicking on the downloaded setup file. Follow the installation instructions that can be found here.
Prepare
a shared folder location and device where your synchronized data
will be located and make it accessible from this PC.
The shared folder can be placed on:
-
Offline devices: USB Drives (Jump Drive, Flash Drive, Sticks (min. 256 Mb is recommended)), Flash memory Cards, or external Hard drives (HD)
-
Your PC (locate and share this folder, check that this folder is available within your network (LAN) or Internet; or if your PCs are always on, you can use free services such as DropBox or SkyDrive to share your folder via Peer-to-Peer connection. This option is recommended if your synchronized PCs have a connection to LAN or broadband Internet (Cable, DSL, etc... >256Mbps.)
Important Note: Free peer-to-peer services allow maximum of 10pt000 files sharing, that means that you are limited to synchronize maximum of 3000 Outlook items (contacts, e-mail messages, calendar events, etc). -
Net Folder on File server of your Network LAN or Internet. This option is recommended if your synchronized PCs have a connection to LAN or broadband Internet.
-
FTP. This option is recommended if your synchronized PCs have a connection to a High Speed Internet (DSL, Cable, Fiber, etc...). We recommend one of the best and one of the most affordable hosting services in the world:1and1.com hosting with an FTP account for just $2.99 per month and 10ptGB of space. You can ask your ISP (Internet Service Provider) for an FTP Account (min. 256Mb, 1GB is recommended), as well.
Another alternative is to use our 4Team FTP Sharing Service based on FTP server to simplify and automate the synchronization process. 4Team FTP service is available from the New Profile wizard. -
Google Calendar™ free calendaring service for Outlook Calendar synchronization, sharing, mobile access and advanced web features.
-
Google Contacts™ free contact manager service of Google Gmail™ service.
-
Google Tasks™ free Google service for managing Tasks and To-Do lists.
After the installation is complete, the Synchronization Setup Wizard will start. If you canceled it before, you can start it by clicking the Sync2 shortcuts available from your computer's desktop or Start->All Programs->4Team Corporation->Sync2.
Click here to learn more about the first synchronization and how to set up a Synchronization Profile.
After
the Synchronization Setup Wizard is complete, the main
Sync2 dialog will open and the first synchronization will start.
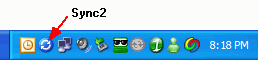
You can close this dialog; Sync2 will process
synchronization in the background. The ![]() Sync2 icon
Sync2 icon ![]() will be available from the Windows tray Menu and can be opened at
any time by double-clicking or from the Right-click
menu.
will be available from the Windows tray Menu and can be opened at
any time by double-clicking or from the Right-click
menu.
After synchronization with your shared folder location is complete ( click here for a screenshot) you can start synchronization on the next PC by adding the PC to the existing synchronization Profile. Learn more by clicking here.
Forward the shared folder location path and/or "offline devices" with the installation-setup file or downloadable link to other participants or to your other PCs and install the product.
The following two main scenarios may happen next:
-
If Outlook folders on the next synchronized PC are empty, your first synchronization is complete.
-
If you have different data in synchronized folders on your second PC, it is possible that you will need to return to your first synchronized PC to perform the final synchronization to make all folders identical. And after that your first synchronization is complete.
Your synchronization is complete. Now all your updates and changes in synchronized Outlook folders will be in sync with other PCs and/or the Google Calendar/Contacts/Tasks service. (Google Accounts:Please re-load/refresh your browser after synchronization.)
For more detailed information about synchronizing folders, click here.
Follow the instructions from the links below (you can forward them to other users):